Rose Swirl Cake Tutorial

I thought it would be really nice to do something special for Valentine's day. It occurred to me that the best gift anyone could receive is an edible one, especially if that gift was made by the one you love.
My daughter and I thought that it would be extra special if we made a cake that we could share with our friends and family. This is the most romantic cake out there at the moment and what better than an edible roses!

Over the past week it has become very apparent to me that family and friends are the most important people in our lives and we should celebrate that every day and more so on Valentines day!
This is not a difficult cake to decorate but it does require a little practice and some patients and if you are feeling very adventurous you could try it in an ombre effect. Here's how.....divide the buttercream and colour as follows, 275g Dark pink, 275g Light pink and 290g palest pink.
Use the remaining 615g of buttercream to sandwich the and crumbcoat the cake, allow to set in the fridge. Divide the various shades into three icing bags with star nozzles attached and ice the first row in on the bottom of the cake dark pink, the second row light pink and the entire top of the cake with your palest shade of pink. If you only have one nozzle and one icing bag then be sure to wash each between each change of shade to prevent the colours bleeding into each other. enjoy!
Serves 8-10
Equipment
20cm (8") Drum cake board
Cake turntable (optional)
Star Icing tip
Icing bag
Pallet knife
Large drum cake board (optional)
Ingredients
20cm (8") Cake
454g Butter, room temperature
1kg Icing sugar
5-6tbsp Milk
2 tsp Vanilla extract
Food colour gel (optional)
Edible pearls (optional)
Edible glitter (optional)
Method
Place the room temperature butter into a large bowl and mix until soft and creamy, gradually add the icing sugar until combined.

Scrape down the side of the bowl and mix again and add the vanilla. Add the milk one tablespoon at a time until the buttercream is a soft consistency but not runny. Add the food colouring gel, mixing after each addition until you reach your desired shade.

Place the bottom layer of the cake on the 20cm (8") cake board and cover with the buttercream. Top with the second layer.

Using a pallet knife (or the back of a butter knife) apply a crumbcoat of buttercream to the cake, allowing the crumbcoat to set in the fridge for 10-20 minutes before icing.

This is the icing nozzle I used for my cake. However the most popular tip for this job is the Wilton 1 M tip, which can be tricky to find in these parts. Use whatever tip you have that will give you a similar rose like swirl.

Meanwhile you can practice your rose swirl on parchment paper before icing directly onto your cake. Begin by holding the bag vertically (fig. 1), apply pressure and move in a anticlockwise direction and pipe the swirl, release the pressure (fig. 5) on the piping bag and lift upwards...ta da!

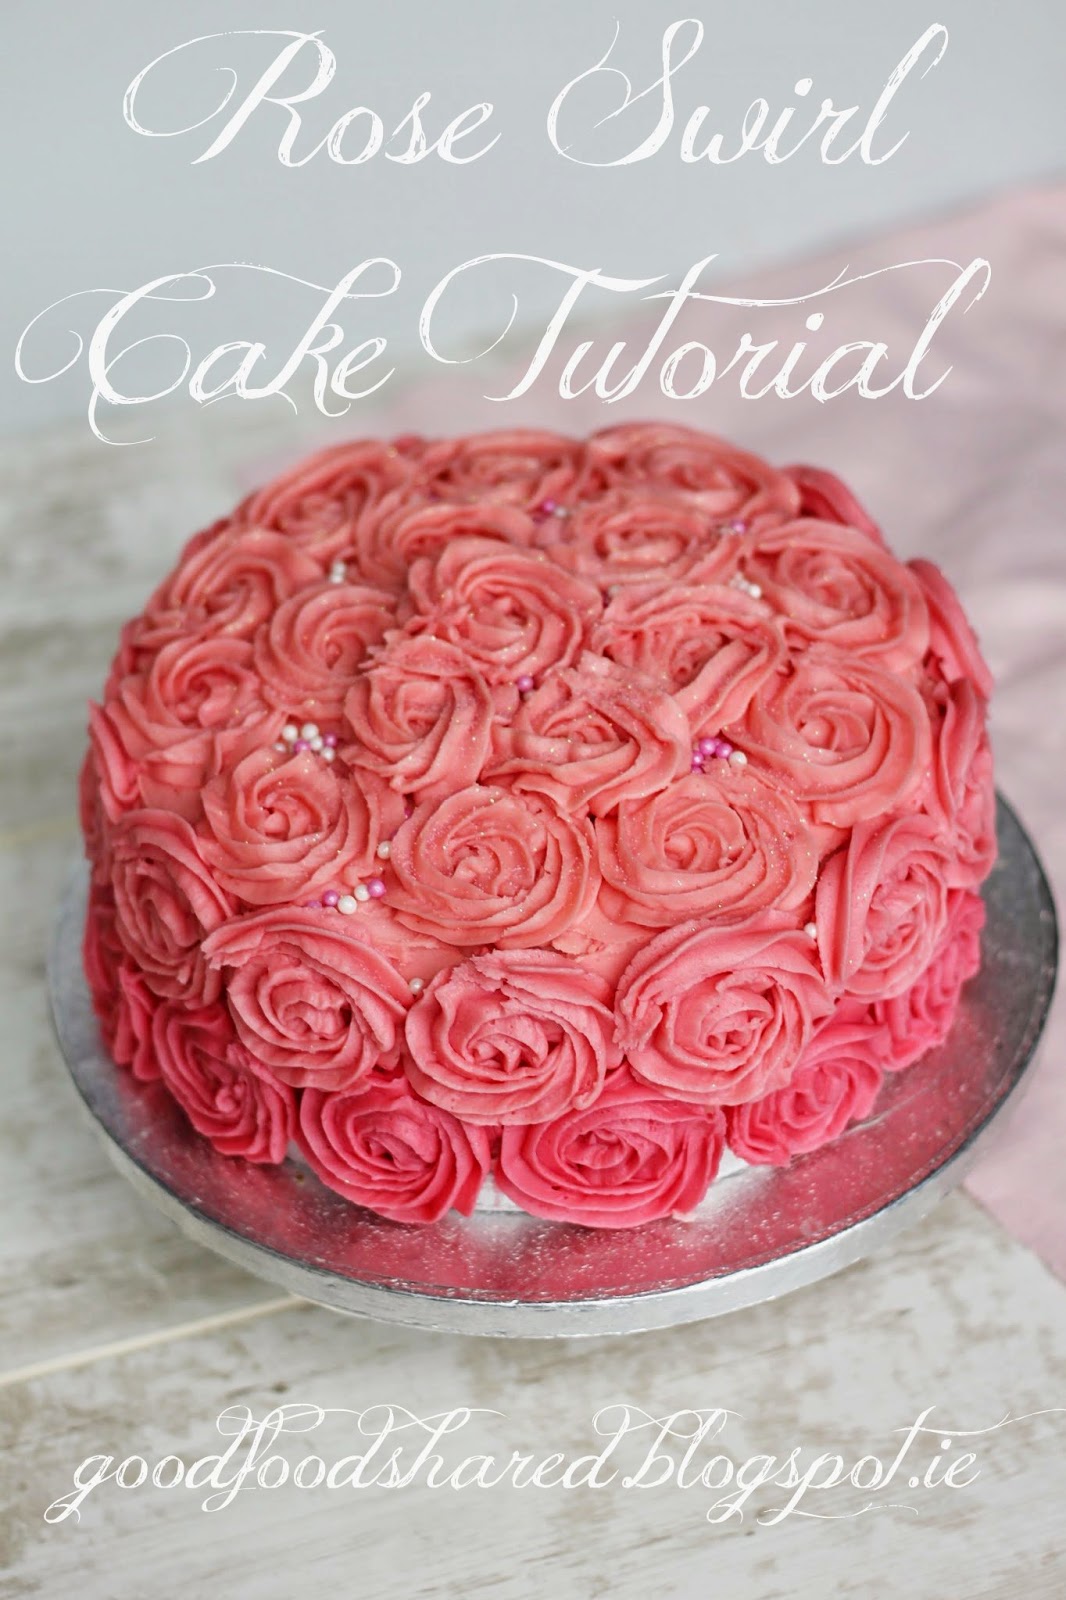
Place the cake on a turntable or an upturned plate and ice the roses directly onto the side of the cake, rotating the cake on the turntable or plate. Keep the roses as close together as possible and try to judge the closing gap so that you can fit a full row of roses right around the circumference of the cake. Once the first row is finished, start the second row in an offset position (fig. 3) so that each rose sits between the one below. This will reduce the gaps between the first row and the second row. If you are unhappy with one of your roses, gently remove it with a small blunt knife (fig. 5) and start again. Ice the top of the cake exactly the same as you did the sides, rotating the cake rather than leaning over the cake. Two more rows should finish the top of the cake with one more rose right in the centre. Fill the small gaps on the top and sides with more small piped flower or like I did with edible pearls. Give the cake a dusting of edible glitter for the extra special finish.


Comments
Post a Comment